Monday, December 26, 2011

Ruffly Crocheted Scarf

Wow....three posts in one week...we are on a roll. {make sure you scroll down and see Amy's AWESOME Christmas dresses. My husband and 12 year old son didn't really want ruffly Christmas dresses so I just bought them red ties to match the red shirt I got myself for $4 at Target on clearance.} Amy's are GORGEOUS, don't miss them! 


I did however make some super cute ruffly scarfs for Christmas gifts {one for myself} and the other ones for gifts. I LOVE how they turned out. Super ruffly and soft. I used Lion Brand Homespun Yarn that I got on sale at Joann's Crafts. I used this tutorial that I found on Pinterest, and then made a few adaptions. I used a N/10mm hook {because the yarn is so bulky} and changed the pattern as follows:


Ruffly Scarf 


Chain 113 

Round 1: Work 1 double crochet (dc) in the third chain (ch) from the hook. Dc in each ch to the last ch. 


Work 5 dc in the last ch.


Do not turn. Work along the back of the foundation chain working 1 dc in each ch to the first ch.


Work 4 dc in the first ch for a total of 5 dc and slip stitch (sl st) to the beginning dc to join.


Round 2: Ch 3...


Work 2 dc in the same stitch.


Work 3 dc in the next dc and every dc thereafter... 


...working around the end and all the way around the scarf.


Join with a sl st.  Weave in ends. Wear!


Photobucket

Sunday, December 25, 2011

The Christmas Dresses

YES, I AM CRAZY.  If you haven't figured that out yet, then you will when you see these two photos.  This year I decided to make Christmas dresses for the girls and then it snowballed into something for everyone except Dave.  But he really started the whole thing by buying that Burgundy colored shirt.  I was in love (with the shirt) it was beautiful.  {Funny side note: you can barely see it in the pictures.  Trust me it is the most beautiful color.}
So the quest began to make dresses to match the shirt.  Then the snowball began moving and TA-DA - The DRESSES.


Oh, yeah, two matching ones for the girls, one for me, and to make it fun - a vest for Peter.

I saw the idea for the girls dresses on one of my favorite blogs - Make It and Love It.  She is amazing and she made a ruffle dress for her daughter with a t-shirt and ruffle material.  I wanted to step it up a notch and so I made the shirts out of stretch velvet.  I actually found my ruffle material at Hobby Lobby, where I was able to use my 40% of coupon to bring the cost down a little.  You can buy the material at the Ruffle fabric shop but I wasn't sure how much I needed and didn't want to pay the price for it.  I can't say anything about the quality of either compared to each other.  But I liked the ruffle material, but with any of them you are going to have to match ruffles on the sides and that was a pain and I did clip some of the ruffles unintentionally when I was cutting my top out.  It worked out okay.  Anyway, when I bought the material I was a bit generous in my purchase because I had come up with an idea for me.  NO, I was not going to wear ruffles on my butt (it is NOT little and I don't need to accentuate that point.)  I think I bought 2 yards. 

For the girls I used various patterns I have at home and patterned the tops after dresses they already had.  The skirts are just pieces of the material gathered on just like Ashley did in her tutorial.  I also followed her instructions for the sash.

I had found a dress at a swap our church has yearly for clothing.  It was too large for me but I had hopes that I would be able to take it apart and adapt it for me.  When I started thinking about this project, that dress came to my mind.  It was perfect.  I cut off the top and "designed" myself a top.  To be honest, I had some knit fabric that I made a muslin out of to test the sleeves and the neckline.  It turned out okay and so I proceeded.  It took me a couple of days to get the sleeves right.  First try I looked like I was going to be playing in a Mariachi band.  I have to admit I was a bit down and didn't want to try any more.  I thought to myself.  This "designing" thing is for the birds.  But as you can see, it turned out beautiful and I was excited to walk into church as that "MATCHY MATCHY" family for Christmas.

You would not believe how close of a match the material for our sashes and Peter's vest were to Dave's shirt.  Dave even said it looked like they were cut out of the same material.  Peter's vest came together in a little more then and hour.  He was pretty grumpy this morning when we pulled him away from his toys and MADE him where THAT vest.  I promised him chocolate kisses (and mommy kisses) if he wore it and the tie.  I used a pattern I bought a year or so ago.  But you could really use an old vest and make a pattern off it.

Lastly, I am quite proud to say that I had them finished the day before Christmas Eve.  I finished up the final touches around 1 pm and was able to spend the rest of the day playing with my family.  So I made the flowers from instructions form Vanilla Joy for Satin Peony Flowers.  I made two for the girls hair and 3 for our dresses.  For the girls I used a tutorial from Make it or Love it for non-slip hairbows - and Esther's stayed in the whole time at church.

Okay so here is a better picture of the dresses.  I like all our faces (except Peter) in the one above, but this one is actually a better picture (and took less time to photoshop out the table in the background.


This is one of those times I am proud of my sewing skills.  It was crazy for me to make these but it worked.  {Of course the kids didn't get new sewn PJ's for Christmas because it took me longer to make my dress then expected - but they got a TON of things for Christmas anyway and didn't notice.  I guess I'll try and get them done for New Year's instead.:) }

**My jewelry was made by Liberty.  She is so awesome.  Now I have a really beautiful set of jewelry from her.  And for a special treat, I had her make bracelets for the girls.  They loved them.  Esther kept hers on the whole time.  She is really one of those girly girls.  She loves to put on jewelry and carry around purses.
Photobucket

Saturday, December 24, 2011

Merry Christmas


What the back of the card said:

This year has been full of many FIRSTS

Kirsten started FIRST grade * Esther had her FIRST birthday * Dave started his FIRST commute on the bus and train to his new job in Chicago * Peter started going to his FIRST preschool * We took Esther (and her siblings) on her FIRST airplane ride and trip to Utah * We lived through our FIRST blizzard in Chicago * Kirsten had her FIRST toothless school picture (missing both top teeth.) * Esther took her FIRST steps around Halloween * Kirsten passed her FIRST spelling test with flying colors * Peter had his FIRST ride on the Metra Train (along with the rest of the family) *

Hopefully we can be the FIRST to wish you a Merry Christmas and a Happy New Year!

Photobucket

Monday, December 19, 2011

EASY Christmas Idea!!

My mother-in-law found this ADORABLE idea. It's super easy and I even made the printable for you so you can just print it and attach it to a roll of paper towels and you have a super easy gift for your neighbors and friends. Get the printable HERE.  Or try HERE.


Photobucket

Saturday, November 19, 2011

Family Wood blocks


So I have had these blocks for a long time.  If I had realized I didn't have a before picture then I would have taken one of them.  But think "toll" painting.  Mainly each letter a different color in a blue, brown, burgundy pattern (ABC for those with primary grade kids) and splattered with black and white paint.  Really cute but they didn't match my decor and I was "tired" of the look.  Then while I was in Utah over the summer I saw that my sister-in-law had painted hers all black.  It looked awesome and matched her frames so great.  I decided that I was going to do that when I got home. 

Well almost 5 months after we got home and I finally got around to it.  I decided after making my Be Thankful sign last month that I LOVED the pattern and coloring of the paper.  I ran back to Micheals and bought more so I could mod podge the paper on my family blocks.  I sanded the old paint off and painted the sides black.  Mod podged the paper on and then did a little smudge on the sides of the letters to make it look a little messy.  I LOVE, LOVE, LOVE how they turned out.  It only took me a little bit of time and it looks awesome.  It is even better that I didn't have to touch the heart.  It matched perfectly and give it a nice look.  It also matches my frames - they are black and burgundy.

Sorry about the glare on the pictures, I tried not to but the reflection just happened in all my pictures.  Plus it was finally a nice day with sunshine since this room doesn't get much "good" light for taking pictures.
Photobucket

Saturday, November 12, 2011

A nursing cover with a twist

One of my friends called me the other day just before her baby was born and asked me for what she would need for a nursing cover.  As we talked I realized that her baby was going to be born in the next couple of days and that in reality she would probably get it done just before he turned 1.  Okay maybe I would have got it done if I were her by the time my baby was one.  So I offered to make it for her, especially since I hadn't started something for her yet.  I used the tutorial from Sew Much Ado for the instructions on how to make it.  

I bought the fabric at Hobby Lobby and decided since it was a little thin that I might need to make it double thickness.  I really thought it would be fun to bring some of the pattern on to the front and so I decided that I would do that.  I guess I could have just cut strips of fabric and done it that way but I decided that I wanted to try one of those self-binding blanket tutorials on it.  I was a bit nervous since I had never done it before and instead of a square like most blankets this was going to be a rectangle.

Here is the tutorial I found for the Self-binding blanket.  My measurements were:
Main fabric: 25 inches by 35 inches
Coordinating/Back fabric: 35 inches by 45 inches

I pretty much followed the tutorial at Self-binding blanket to the point where you are ready to sew around the "binding".  Before I did that I sewed the boning into the top portion and added the
straps to the top.  I closed it up by sewing around like the tutoral for the blanket says.  It ended up pretty cute.  I had enough fabric left over to make diaper and wipes container holder.  I hope she enjoys it.

Here is a second picture to show you it a little closer.  (I tried to model it but I didn't have a baby to put under and my photographer was only 4 years old.


Photobucket

Saturday, October 29, 2011

Mummy Jars

Have you been on Pinterest?

If you need an invite, let me know. {but I'm going to warn you that it's VERY addictive!!!}
If you had been there, you would see that there are 100's of Mummy Jar Ideas. I LOVE them.


 My friend MaryRuth made some and emailed me a picture a few days ago and I HAD to make some before Halloween was here. They are SOOOO easy!!!! {I made two sets of these in less than 30 minutes and for about $2}. I got the LED battery candles. {in the Christmas section at Walmart}


Take old canning jars {or pickle jars, or baby food jars, the possibilities are endless}
get sterile medical gauze that you can buy at walmart (in the pharmacy section)
and then you paint modge podge
all over the bottle
start at the bottom
and start wrapping
you'll need to put
modge podge between the layers of gauze
you only do one layer of gauze
but slightly overlap each layer
and then when its all how you like it
you paint a layer of modge podge on top of the whole thing really quick
and then glue on googly eyes {I like the big ones on the big bottles} with even more modge podged. {or E6000}
that's it.

I stretched and frayed my gauze a little to make it a little more messy. Then add candles. Tea lights or battery LED ones. SOOOOO cute!!! and SO easy to make! Go ahead make 100 of them.


Photobucket

Monday, October 10, 2011

Card Night for Craft Group

Welcome Woodridge 1st Ward Craft Group. We want to have one place online where we can post all of our craft group pictures and projects. We will be posting ALL of our projects here and will give you all the details for each craft group here {so you might want to bookmark it!}.

We are excited to announce our next Craft night will be making homemade cards. It will be FRIDAY NOVEMBER 11th at 7pm at the Woodridge Church building. There will be NO COST for this craft, however you will need to bring your own supplies. We WILL PROVIDE all the stamps, ink and tools. We will also have SOME scrap paper that you can use, but if you want something specific, please bring your own.

You will need to bring:

A TRIMMER {if you have one} will will have a few to share
ADHESIVE {NOT glue, scrapbook adhesive tape, you can get it at Hobby Lobby, Joann's or Michael's}
SCRAP PAPER {we will some}
EMBELLISHMENTS {buttons, brads, ribbon, etc.}
CARD BACKS {you can buy them at the same places and they come in different quantities so you might want to share a pack with someone else who is coming}
ENVELOPES {usually come in the pack with the card backs}


We will mostly be working on Christmas/Holiday cards and Meagan has made some samples for you to "copy" {Thanks Meagan for helping us with this fun night!} If you don't want holiday cards you are welcome to work on ANY cards you want. {thank you, birthday, baby, congrats, etc.}


Come play with us and make some pretty cards. You can make 1 or 100. You can make a "whole set" and tie them up with a pretty bow for a gift to give anybody {mom, grandma, school teachers, bus driver, etc.}. Everyone uses cards and homemade ones make a GREAT gift.

These are cards from the last craft group
If you have any questions, please leave us a comment. ALSO, please comment and let us know if you are planning to come so we can set up enough room for everyone.


Photobucket Photobucket

Tuesday, October 4, 2011

Forget Not....

Did you hear President Uchtdorf's talk on Saturday night at the General RS Broadcast? It was AMAZING. I loved everything about it, but most especially I felt like he was talking directly to me. I felt like it was direct from heaven and that I was the most important person there. I am sure anyone who hears it will feel the same. It was SO good. {I can't way enough good about it.} You can watch and/or listen to it HERE. As soon as we came home I started seeing printables of the tiny forget me not flowers and decided that I wanted to make my own. {you can download them at the bottom of this post!}

I had some free canvas and I wanted to try it on the canvas to see how it would look. I LOVE it. It's exactly what I was hoping for. I printed my image 8x10 and then trimmed the sides down just a little bit so it fit on my 8x10 canvas. I then modge podged it onto the canvas. Be careful to not scrape the picture or it will scrape off the processing of the picture. I love how they turned out....no, they are not as cool as canvas...but they probably cost about $10 or less {if you had to buy the canvas}.


After the modge podge was dry, I painted the edges of the canvas a charcoal gray and blended it on the edges of the photo so it would hide the edge of the photo and look like it was inked on the edges.

 I then got carried away and made a 16x20 of the Salt Lake Temple. I did the same thing with this one, it was a little harder to keep the picture glued down on the canvas because my picture was rolled up when I picked it up from the photo place. Make sure you have a flat photo for easier results.


Here is a close up view of the edges.


Here is the download if you want to print your own "Forget Not" sign.

8x10 PRINT SIZE - Click twice to enlarge and then right click and "save as" to get image
4x6 PRINT SIZE - Click twice to enlarge and then right click and "save as" to get image
    Photobucket

Saturday, October 1, 2011

Reversible Fall Wood signs

Here are some samples of from our latest craft group.  After everyone was done, Liberty and I finished up ours.  I think they are pretty cute.  I have a window in my kitchen that opens to the family room below and so instead of making mine reversible with Halloween on one side and thanksgiving on the other, I just did one for each holiday.  They are so cool.  My favorite I think is the be thankful and I have decided that I might use the paper on the Family Letters I have on my mantel.


We had a great time with everyone and they all turned out so cute. I love working on projects together so we can all get ideas from each other. Thanks ladies for making it so much fun.


Photobucket Photobucket

Monday, September 12, 2011

Easy Peasy Cards

So this weekend I was doing this instead of the many things that I need to be doing. I have needed thank you notes and birthday cards that weren't so girly. So Saturday I cut out 5 different colored stars and the craft brown paper backing with my Cricut and away I went. I think Liberty told me about this idea although I don't know if I ever saw the ones she did. These are simple and basic and didn't take all that long. I stamped the sentiment before hand just so I would have room for it. All I did, after I made them all look grungy with the stamp pad, was hold the stars on as I sewed across them. Since I was doing this assembly line style I just had everything next to me and ran them in one after the other. Here is a close up of the sewing. ( I came back and made an X on them for the second pass.)


I think it took me more time to pull the threads back in and tape them to the back.

I made these in a 3 1/2 x 5 inch card with the fronts only being 3 x 4 3/4, but they could be made for larger. I just have a million little envelopes from who knows where.

Just a bit of housekeeping for this site now. Liberty and I are at the point where we aren't going to be posting all the time. Mainly just when the mood suits us. We are at that part of life where it gets too busy and we have to let something go. I'm not saying we are never going to blog but we just aren't going to feel guilty about not doing it. Life is crazy that way. Hope you understand. We will probably use the blog as a filing place for our projects we make.


Photobucket

Saturday, August 20, 2011

Ruching + Pillowcase Dress = CUTE

I always hate to toot my own horn, but this time I think I came up with a pretty good idea.  Not sure if I have seen it around the web.  Actually didn't look for it, just came up with it on my own after I made the ruffled notebook covers.  Or maybe the other way around.  I can't remember.  I have been dying to get these up on our blog but just have not got the pictures done.  These were actually made before the Easter dresses I made.  I know - what a slacker I am.  I finally took the kids out and took pictures of them.  I don't think you can see the ruching in Esther's dress but as you see in the following pictures, I made a white ruching section.  I divided the dress into thirds and made the bottom a solid blue.  The white is 3 or 4 inches of a white on white print and then the top is a red star material. 


A better look at the whole dress on Kirsten.


Now you can see both the ruching and the ruffle bottoms I made for Esther. 


Here is a little bit closer look on the bigger dress.  One thing I didn't like about the ruching is it kind of puffed out.  Maybe if I put a solid piece behind it there would be less puffing?   I don't know.  It still looks cute.


Although I'm not really sold on the pillowcase dresses.  They are cute but just hang on my little skinny girls.  I like a more fitted dress on them.  Maybe next time (if there is a next time) I will do a gather in the center to make it more fitted on them.

Photobucket

Sunday, August 7, 2011

RACE CAR Birthday Party

 About a month ago Peter said he wanted a race car birthday cake.  So, I decided to oblige.  I then decided that we were going to do the whole thing race car themed.  While walking through JoAnn's I happened upon some black and white checkered felt.  Peter was with me and he thought it was the coolest fabric and I agreed.  He carried that fabric around the store until we got it cut.  I had no idea what I was going to do with it or how much to get and so I bought 2 yards.  It was $5.99/ yard and I had a 40% off coupon.  It was only 30 inches wide which really wasn't a problem when I worked with it. 

So here we go.  The invitation.


This was designed by me with the kits Busy Roads and The World is Moving by Kitty Designs (found at Oscraps.com)  I got my ideas for the wording from different sites.  I don't exactly remember where.  I just put in race car birthday party ideas and this is probably a combination of a couple ideas.  I had them printed at Sam's. 

Next I discussed with Peter what he wanted to do for his cake - circle or rectangle shape.  With a round track or oval.  Then after I got a general idea of what he wanted along with some help from his sister we were off.  Trying to figure out how to make a black track.  I went to JoAnn's again and found in the Wilton area some black sugar paper.  It was perfect for what we needed.  I ended up again using my 40% off coupon and actually ended up going back and buying a 2nd one.  I wanted to make a checkered flag to go around the sides.  Anyway here is the cake and a few extra pictures so you can get an idea of what I did.


The grandstands were an idea I found when looking at race car cakes.  I wish I could send you to the link but all they are is frosting covered cardstock with sprinkles.  I thought it was such a cute idea and had to incorporate it in.


The border is M&M's, I let the kids put them on and they loved doing that.  I did put a little "flower" border so they would have somewhere to stick them.


The center is just green tinted frosting made to look like the center field of most race tracks.


Lastly, one of my favorite parts - the checkered flag sides.  I cut the sugar paper with my ruler and the pizza cutter.  It made it easy.  Then I frosted small sections and added the black squares.

The entire cake is frosted with buttercream frosting.  I found my recipe here at I am a Baker (it is at the way bottom after the cake.)

I used a recipe that I found a couple of years ago for the best chocolate cake - and I really think it is.  I think most of the kids gobbled up their pieces.  Of course I cut really small pieces, since I know most kids just waste the cake at this age.

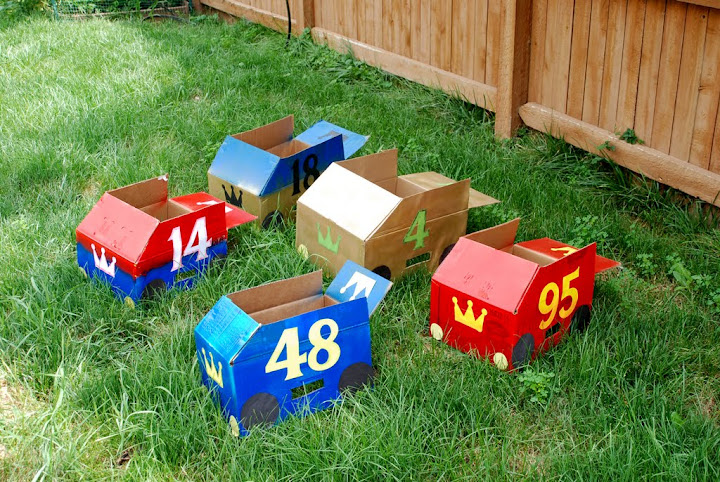
Next we had to have race cars.  I found this idea at How Does She?  I loved the idea of race cars made from cardboard boxes.  I think they turned out pretty cute.


I invited 4 boys and Peter  and so I decided to make 5cars.  They were way easy to make and I had everything except the paint.  I made the car numbers similar to race cars in Nascar, although I only had 3 cans of paint and so I had to make some of the cars different then the original cars.  I made one with the #4 since Peter was turning 4.  They were fun to make.

Since I knew that the kids would probably only race for a little while I thought I better come up with something else.  Off to the garage I went and found a long piece of wood about 4 feet by 1 1/2 feet.  I found a couple of smaller pieces that were about one inch square by 3 1/2 feet.  I hooked them to the edge and we were able to have matchbox car races on that.  If the wood hadn't been something we need for shelves I would have probably have nailed the sides down instead of clamping.  Either way the kids didn't really care.  At times I saw cars and trucks bigger then the match box size going down.  The kids thought that was pretty cool.


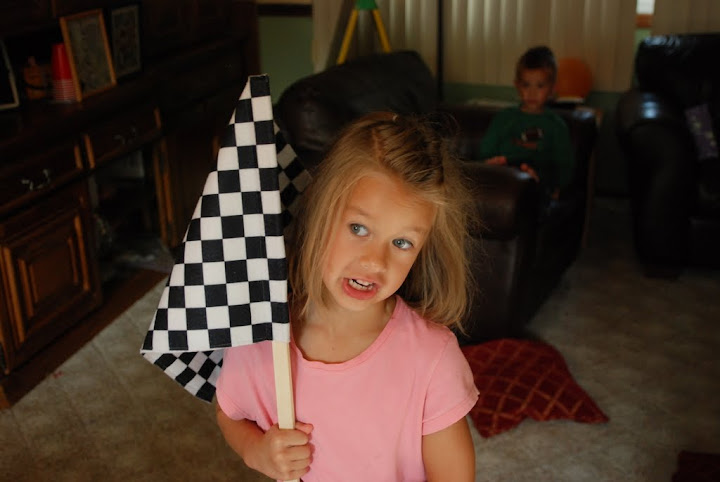
Out of the checkered fabric I made a checkered flag for the races. 


I also made mini checkered flags to go in the goodie bags.  Instead of $1 store items in the bags I bought a matchbox car for each, a big play-doh, a fruit snack and a handful of starbursts.  I would have taken a picture but I didn't really think about it.

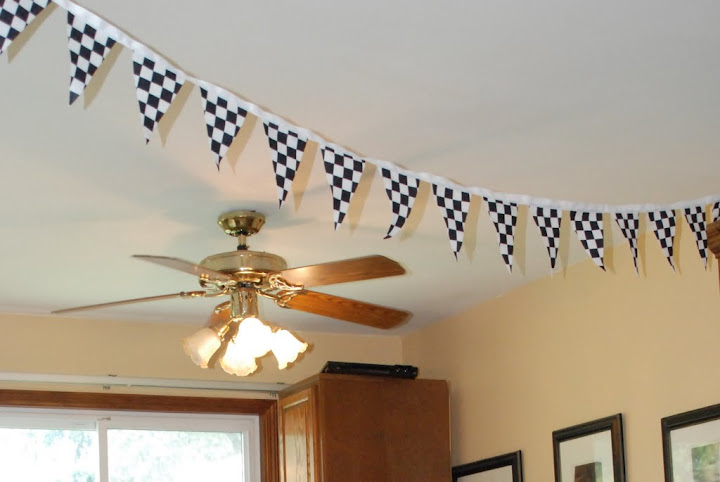
I cut the fabric into squares to put under the cake and on the table for the gifts.  Then I took the remaining fabric and made a checkered flag banner or bunting.  I think it turned out pretty good.  I used a grosgrain ribbon to sew it onto. 


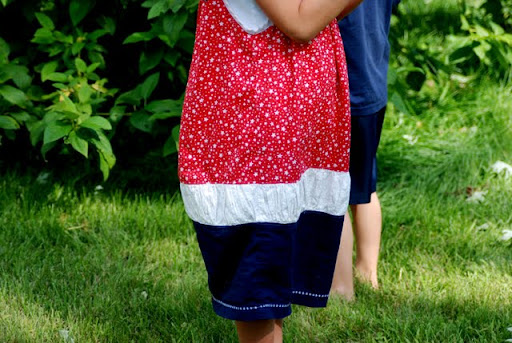
Here is the cute birthday boy showing off the bunting. 

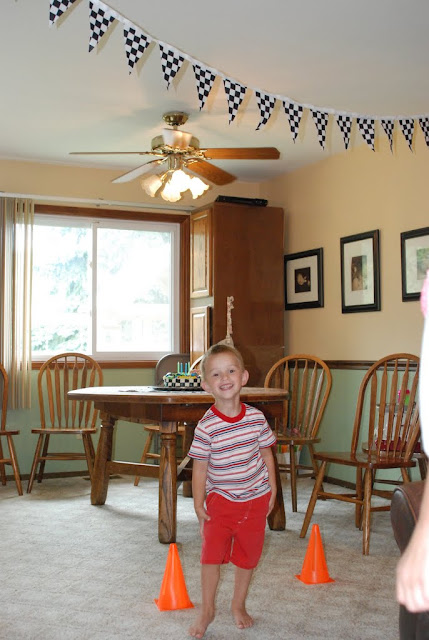
I also bought a pack of cones to mark off the race.  If it hadn't been 100+ heat index the day of the party we would have been able to go outside and do the races.  With it so hot outside we ended up doing the races around my kitchen living room "track".  Since we didn't get a chance to race outside I was glad I had set the Cars movie to watch the final race.  It seemed fitting to end the fun with a "real" race.

Happy 4th Birthday to my dear sweet boy!!


 Photobucket

LinkWithin

Related Posts with Thumbnails